Save
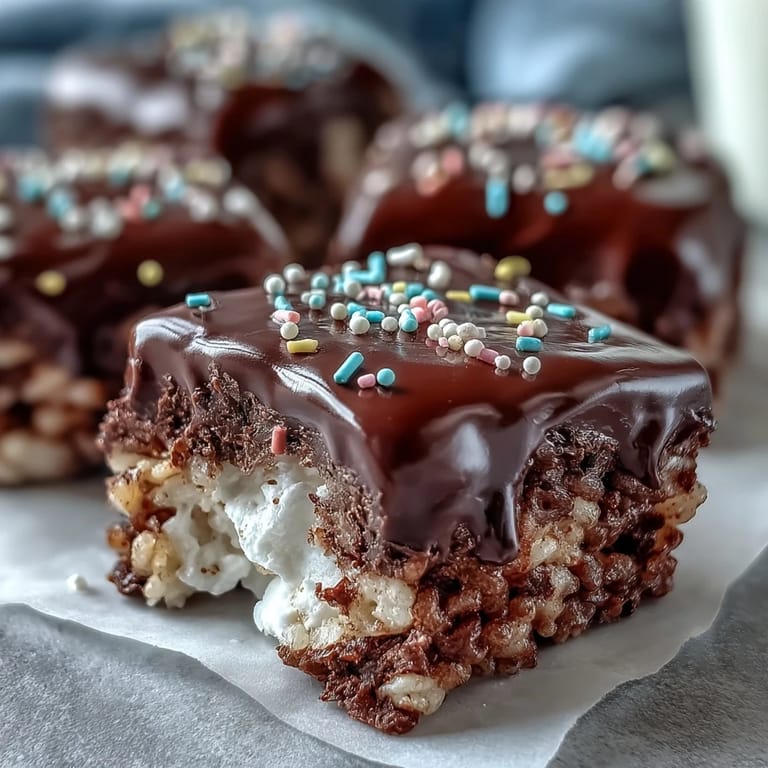
Save My youngest walked into the kitchen one Saturday and asked if we could "make those crunchy squares but fancier." I had no idea what she meant until she pointed at a bakery photo on her tablet—Rice Krispy treats dipped in chocolate and covered in sprinkles. We spent the afternoon melting, spreading, and decorating, and by the time we finished, the counter looked like a craft explosion. Those chocolate-covered bars disappeared faster than any dessert I'd made in months.
I brought a tray of these to a potluck once, and someone asked if I'd bought them from a candy shop. I laughed and told her the whole thing took less effort than making cookies. She didn't believe me until I walked her through it the next week. Now she makes them for every birthday party her kids attend, and I get a photo every single time.
Ingredients
- Unsalted butter: Melts the marshmallows without adding extra salt, and a little extra greases the pan so nothing sticks.
- Mini marshmallows: Melt faster and more evenly than the large ones, creating that perfect gooey binder.
- Rice Krispies cereal: The iconic crunch that holds everything together and soaks up all that marshmallow sweetness.
- Fine sea salt: Just a pinch balances the sweetness and makes the chocolate topping taste even richer.
- Semisweet or dark chocolate chips: Melts into a glossy, firm shell that snaps when you bite into it.
- Vegetable oil or coconut oil: Thins the chocolate just enough to spread smoothly without seizing up.
- Rainbow sprinkles or chopped nuts: Add color, crunch, and a little personality to every square.
Tired of Takeout? 🥡
Get 10 meals you can make faster than delivery arrives. Seriously.
One email. No spam. Unsubscribe anytime.
Instructions
- Prep your pan:
- Grease an 8x8 or 9x9-inch pan generously with butter so the bars lift out cleanly later. If you line it with parchment, leave some overhang to use as handles.
- Melt the butter:
- Set a large saucepan over low heat and melt the butter slowly, stirring so it doesn't brown. Low and slow keeps everything smooth.
- Add marshmallows:
- Toss in the mini marshmallows and stir constantly until they melt into a thick, creamy pool. It takes a few minutes, but don't rush it or they'll scorch.
- Season and mix:
- Pull the pan off the heat and stir in the salt if you're using it. Then fold in the Rice Krispies gently until every piece is coated.
- Press into the pan:
- Scrape the mixture into your prepared pan and press it down firmly with a buttered spatula or your hands. Even pressure gives you clean, uniform bars.
- Let it rest:
- Leave the pan at room temperature for about 10 minutes so the base sets up a little before you add chocolate. This keeps the layers distinct.
- Melt the chocolate:
- Combine chocolate chips and oil in a microwave-safe bowl, then heat in 30-second bursts, stirring after each, until glossy and smooth. Patience here prevents grainy chocolate.
- Top and spread:
- Pour the melted chocolate over the cooled base and spread it evenly with an offset spatula or spoon. Work quickly before it starts to set.
- Add sprinkles:
- Scatter rainbow sprinkles or chopped nuts over the wet chocolate right away so they stick. This is the fun part.
- Set the chocolate:
- Let the whole pan sit at room temperature for at least an hour, or pop it in the fridge for 20 to 30 minutes if you're in a hurry. The chocolate should be firm to the touch.
- Cut into bars:
- Lift the block out using the parchment overhang or carefully invert it onto a cutting board. Use a sharp knife to slice into 12 to 16 bars, wiping the blade between cuts for clean edges.
 Save
Save One evening, my neighbor knocked on the door holding an empty plate and asked if I had any more of "those chocolate things." Her kids had devoured the ones I'd sent over that morning, and she wanted to know the recipe. I handed her the ingredients list on a sticky note, and now we trade batches every few weeks. It's become our unofficial dessert swap tradition.
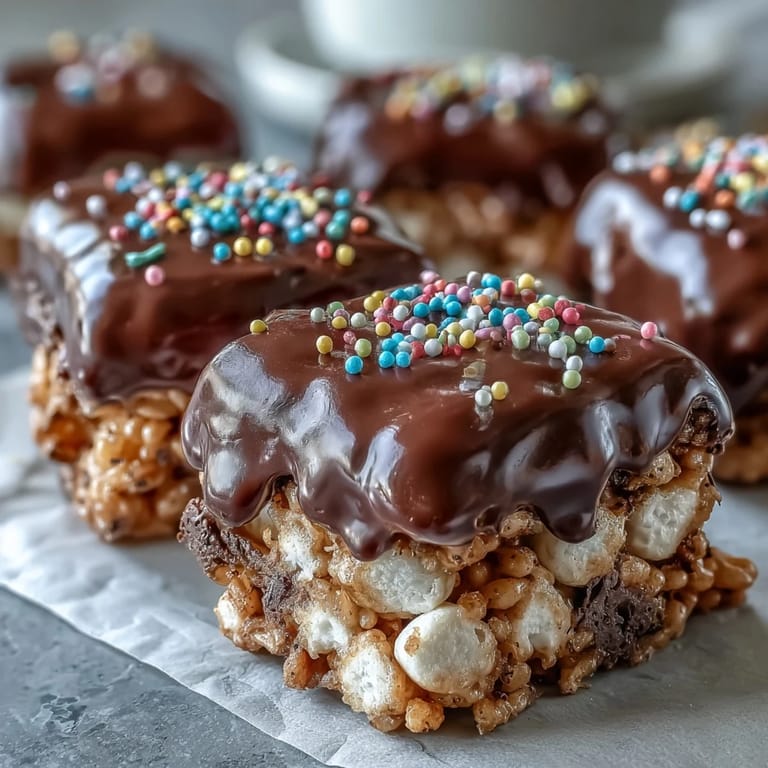
Flavor Variations You Can Try
Stir half a teaspoon of vanilla extract into the melted marshmallows for a subtle warmth that makes the whole treat taste more homemade. You can also swap semisweet chocolate for white chocolate and use pastel sprinkles for baby showers or spring gatherings. I once added a pinch of espresso powder to the chocolate, and it gave the bars a grown-up edge that disappeared faster than the original version.
Storage and Freshness
These bars stay soft and snappy in an airtight container at room temperature for up to three days, or you can refrigerate them for a week if your kitchen runs warm. The chocolate might sweat a little when you bring them back to room temp, so let them sit out for a few minutes before serving. I like to stack them between sheets of parchment so they don't stick together, especially if I'm packing them for a party or gifting a batch to a friend.
Finishing Touches
If you want a truly professional look, let the melted chocolate cool to about 88 degrees Fahrenheit before pouring it over the base. It sets with a prettier shine and snaps cleaner when you bite into it. I usually don't bother with a thermometer unless I'm making them for something fancy, but the difference is noticeable if you have the patience.
- Use an offset spatula to spread the chocolate in one smooth motion instead of going back and forth.
- Chill the finished bars for just 10 minutes before cutting if you want ultra-clean edges.
- Wipe your knife with a warm, damp towel between each cut to keep the chocolate from dragging.
 Save
Save There's something deeply satisfying about turning a childhood snack into something that feels special enough to share at grown-up gatherings. Every time I make these, someone asks for the recipe, and I love that it's simple enough to explain in under a minute.
Recipe FAQs
- → How long do these treats stay fresh?
Store in an airtight container at room temperature for up to 3 days, or refrigerate for up to a week. The chocolate may lose its gloss when refrigerated but will regain it at room temperature.
- → Can I use white chocolate instead?
Absolutely! White chocolate works beautifully and creates a lovely contrast with the colorful sprinkles. You can also drizzle both dark and white chocolate for a decorative finish.
- → Why add oil to the chocolate?
The vegetable or coconut oil helps the chocolate set with a glossy finish and makes it easier to cut clean bars. It also prevents the chocolate from seizing and keeps it smooth.
- → Can I make these ahead of time?
Yes! These bars actually improve after sitting for a few hours as the flavors meld. Prepare them up to 2 days in advance, store at room temperature, and serve when ready.
- → What's the best way to cut clean bars?
Let the chocolate set completely at room temperature for at least 1 hour. Use a sharp knife warmed under hot water and wiped dry between cuts for clean edges. You can also lift the entire block out using parchment paper overhang.