 Save
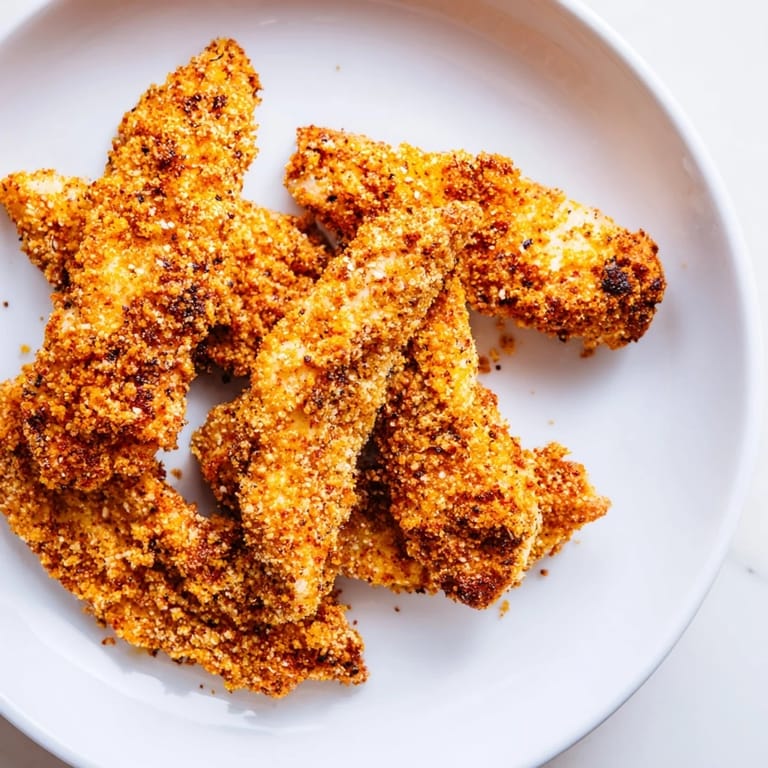
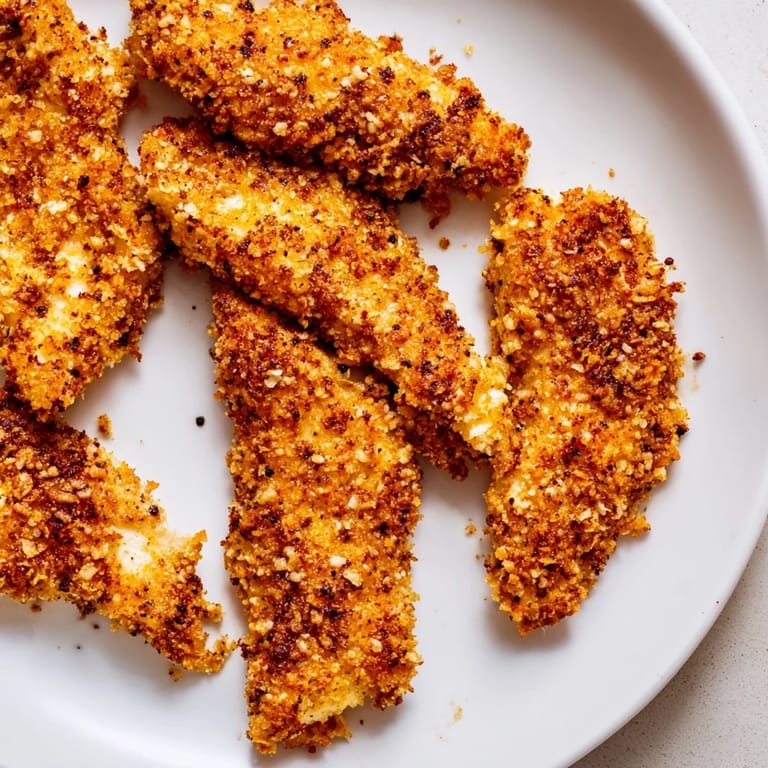
Save There's something almost meditative about standing at the air fryer with a batch of chicken tenders, watching them turn golden through that little window. I stumbled onto this recipe one Tuesday evening when I was tired of takeout but craving that satisfying crunch without all the oil, and somehow these became the thing I make when I want to feel like I've actually cooked something worthwhile. The whole process takes barely half an hour, which feels like a small miracle when you taste how crispy the outside gets while the chicken stays impossibly juicy inside. It's become my go-to when friends drop by hungry or when I need dinner on the table without the usual scramble.
I made these for my sister's family on a random Sunday, and her kids actually asked for seconds without being prompted, which in parenting language apparently means I'd discovered something special. My brother-in-law, who prides himself on being a home cook, admitted these were crunchier than anything he'd attempted at home, and I didn't have the heart to tell him it was mostly about the air fryer doing the heavy lifting. That moment made me realize this recipe was less about impressing anyone and more about having something reliable that just works.
Ingredients
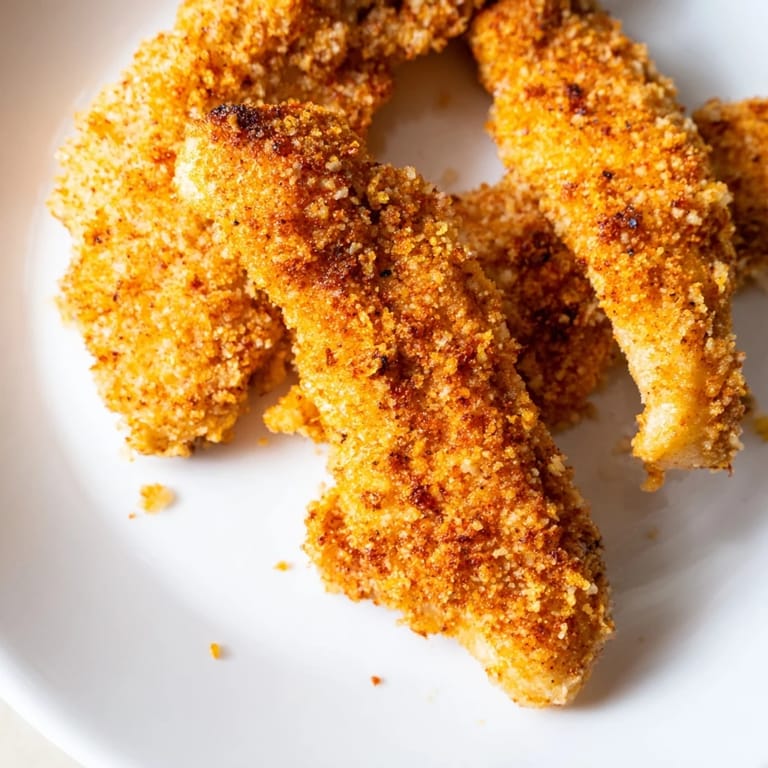
- Chicken tenders or sliced breasts (500g): The thinner you slice them, the faster they cook and the crispier they become, so don't be shy with the knife.
- Whole-wheat breadcrumbs (75g): These actually hold onto flavor better than the plain stuff, though panko is your secret weapon if you want maximum crunch.
- Grated Parmesan (30g): This is doing more work than you think—it browns gorgeously and adds a salty depth that makes people ask what your secret is.
- Smoked paprika (1 tsp): Don't skip this; it's the flavor that makes people go "wait, what's in this?" when they taste it.
- Garlic and onion powder (1/2 tsp each): Together they create an umami layer that standard seasoning just won't give you.
- Dried oregano (1/2 tsp): A small amount keeps things interesting without overpowering the chicken.
- Salt and pepper (1/2 tsp and 1/4 tsp): Season to taste because breadcrumb batches vary, and you want that salt hitting your tongue first.
- Eggs and milk (2 large eggs, 2 tbsp): This mixture is your glue; the milk loosens the egg so it coats evenly without getting gluey.
- Olive oil spray: A few light bursts make all the difference between dry and golden, so don't overdo it.
Tired of Takeout? 🥡
Get 10 meals you can make faster than delivery arrives. Seriously.
One email. No spam. Unsubscribe anytime.
Instructions
- Warm up your air fryer:
- Set it to 200°C (400°F) and let it run for 5 minutes while you prep everything else. This preheat time is what gives you that initial sizzle that starts the browning process.
- Dry the chicken thoroughly:
- Pat each piece with paper towels until they feel almost papery. Moisture is the enemy of crispiness, so take this step seriously.
- Make your wet mixture:
- Whisk eggs and milk together in a shallow bowl until it looks like pale scrambled eggs. The milk keeps it from being too thick, which matters more than you'd think.
- Combine your dry coating:
- Mix breadcrumbs, Parmesan, paprika, garlic powder, onion powder, oregano, salt, and pepper in a second bowl. Run your fingers through it to break up any clumps—you want it uniform.
- Coat each piece carefully:
- Dip the chicken into the egg mixture, let excess drip off, then press it into the breadcrumb mixture, turning to coat all sides. The pressing motion is what helps everything stick instead of sliding off mid-cook.
- Arrange and spray:
- Lay the coated tenders in a single layer in the air fryer basket—don't crowd them or you'll steam instead of fry. Give them a light spray of olive oil on both sides; this is what makes them golden, not greasy.
- Air fry and flip:
- Cook for 10–12 minutes total, flipping halfway through. You're looking for golden brown with no pale spots, and an internal temperature of 75°C (165°F) if you're the thermometer type.
- Serve immediately:
- Hot out of the basket is when they're crispiest. Have your dipping sauce ready because they disappear fast.
 Save
Save There was a moment when my partner walked into the kitchen while these were cooking and just stopped to smell the air—that combination of Parmesan and paprika filling the whole space made them remember their grandmother's kitchen, which isn't even the same cuisine but somehow worked. Food has this weird power to unlock memories that have nothing to do with the recipe itself, and watching someone's face change because of something you made is actually why I keep cooking at all.
The Panko Upgrade You Should Know About
If you want to take crispiness to a level that feels almost unfair, swap the whole-wheat breadcrumbs for panko and watch what happens. Panko is larger and airier, so it browns faster and louder, literally crackling when you bite into it. I experimented with this one afternoon when I had panko leftover from something else, and the texture difference was so obvious that I actually made the same batch twice in one week to confirm it wasn't a fluke.
Making Them Dairy-Free Without Sacrificing Flavor
The Parmesan in this recipe isn't just there for taste; it's doing the browning and adding saltiness that you'll miss if you skip it. Nutritional yeast is the move here—it has that same savory punch and actually browns similarly in the air fryer heat. My friend who's dairy-free made these with nutritional yeast and honestly, I couldn't tell the difference until she mentioned it, which is the highest compliment a substitution can get.
Beyond the Air Fryer
If you're cooking in a convection oven instead, bump the temperature to 220°C (425°F) and add 3–6 minutes to your cooking time, checking at the 15-minute mark. The convection still circulates heat well enough to get decent browning, though you won't get quite the same shattering crunch as the air fryer delivers. I've tested this on a weekend when my air fryer was mysteriously buried in a cabinet, and while the results were respectable, I remembered why I prefer the air fryer method.
- Line your baking sheet with parchment paper to prevent sticking and make cleanup actually enjoyable.
- If you're batch cooking for a crowd, keep the first batch warm in a low oven while the next round cooks.
- Let them rest for one minute after cooking—it sounds silly, but it sets the coating and keeps them crunchier longer.
 Save
Save These tenders have become my answer to "what's for dinner" more times than I can count, and they've somehow made me look like a better cook than I actually am. There's something satisfying about a recipe that's genuinely easy, tastes indulgent, and comes together faster than you'd expect—that's the whole point of keeping this one on repeat.
Recipe FAQs
- → What is the best way to ensure crispy chicken tenders?
Using whole-wheat breadcrumbs combined with Parmesan and spices creates a flavorful crust. Lightly spraying olive oil before air frying helps achieve a golden, crispy texture without deep frying.
- → Can I use chicken breasts instead of tenders?
Yes, boneless, skinless chicken breasts sliced into strips work well for even cooking and coating.
- → How do I make this dish dairy-free?
Replace Parmesan cheese with nutritional yeast or omit it entirely to avoid dairy while maintaining umami flavor.
- → Is there an alternative if I don't have an air fryer?
You can bake the coated chicken strips in a convection oven at 220°C (425°F) for 15–18 minutes, turning halfway for even browning.
- → What dipping sauces pair well with these chicken tenders?
Greek yogurt-based dips, mustard sauces, or fresh salads complement the crunchy tenders and add refreshing contrast.
- → How can I adapt this for gluten-free diets?
Use certified gluten-free breadcrumbs to maintain the crispy texture while avoiding gluten ingredients.