 Save
Save The first time I encountered hojicha was at a tiny tea shop in Kyoto where the owner insisted I smell the roasted leaves before tasting anything. That warm, nutty aroma immediately made me think of caramel and cozy evenings, and I knew I had to bring that flavor into something creamy and indulgent. Now this ice cream is my go-to when I want to serve something that feels elegant but still approachable for friends who might be skeptical of tea in desserts.
I made this for a dinner party last fall when someone mentioned they were tired of the same old vanilla and chocolate options. Watching peoples faces light up when that first spoonful hit their tongues, followed immediately by Whats that flavor? and Can I get the recipe? was absolutely priceless. One friend actually texted me the next day saying she dreamed about it.
Ingredients
- Heavy cream: This provides the rich backbone that carries the hojicha flavor without overpowering its delicate roasted notes
- Whole milk: Essential for achieving that smooth, scoopable texture that never feels icy or overly dense
- Hojicha loose leaf tea: Use 3 tablespoons for that perfect balance of roasted, caramel-like flavor without any bitterness
- Egg yolks: Four yolks create the luxurious custard base that makes this ice cream feel like a restaurant-quality dessert
- Granulated sugar: Just enough to sweeten while letting the tea shine through
- Fine sea salt: A pinch might seem optional but it makes all the difference in rounding out the flavors
Tired of Takeout? 🥡
Get 10 meals you can make faster than delivery arrives. Seriously.
One email. No spam. Unsubscribe anytime.
Instructions
- Infuse the cream:
- Combine the heavy cream and whole milk in a saucepan and heat over medium until you see steam rising but before it reaches a boil. Stir in the hojicha tea leaves, reduce the heat to low, cover, and let it steep for 10 minutes to extract all that beautiful roasted flavor.
- Strain and return:
- Pour the mixture through a fine mesh sieve, pressing down on the tea leaves to capture every bit of flavor before returning the infused milk to your saucepan.
- Prepare the yolks:
- While the milk steeps, whisk together your egg yolks, sugar, and salt in a separate bowl until the mixture turns pale and slightly thickened.
- Temper the eggs:
- Slowly pour about 1 cup of the warm hojicha milk into the yolks while whisking constantly, then pour the warmed yolk mixture back into the saucepan.
- Cook the custard:
- Cook over low heat, stirring continuously with a wooden spoon until the custard thickens enough to coat the back of the spoon, reaching 170°F to 175°F.
- Chill thoroughly:
- Strain the custard into a clean bowl, let it cool to room temperature, cover, and refrigerate for at least 4 hours until completely chilled through.
- Churn and freeze:
- Churn the cold custard in your ice cream maker according to the manufacturers instructions, then transfer to an airtight container and freeze for at least 2 hours before serving.
 Save
Save This recipe has become my signature when I really want to impress someone without making myself crazy in the kitchen. The look on my tea-enthusiast friends face when she took her first bite was absolutely worth every minute of stirring and waiting.
Serving Suggestions
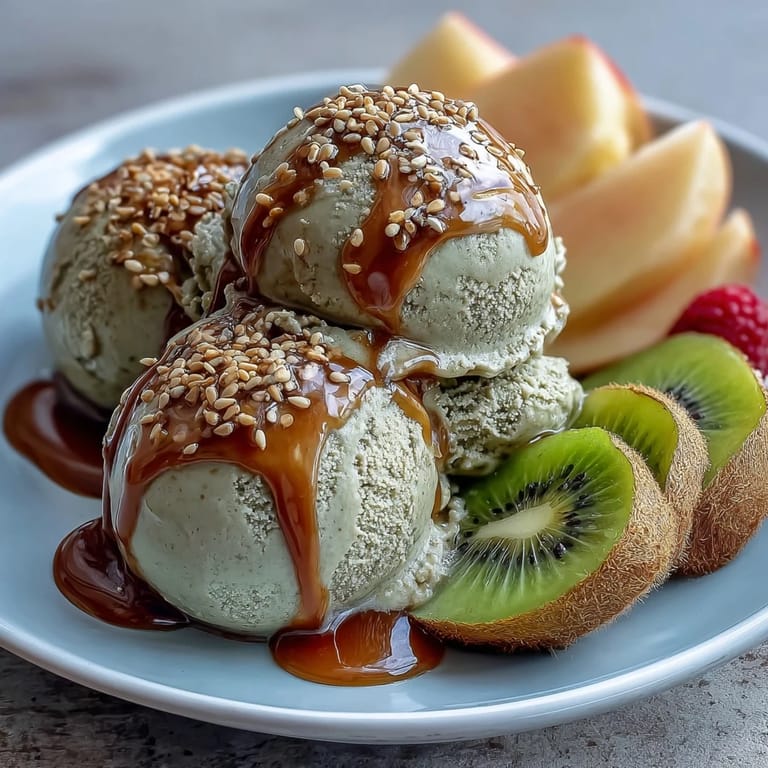
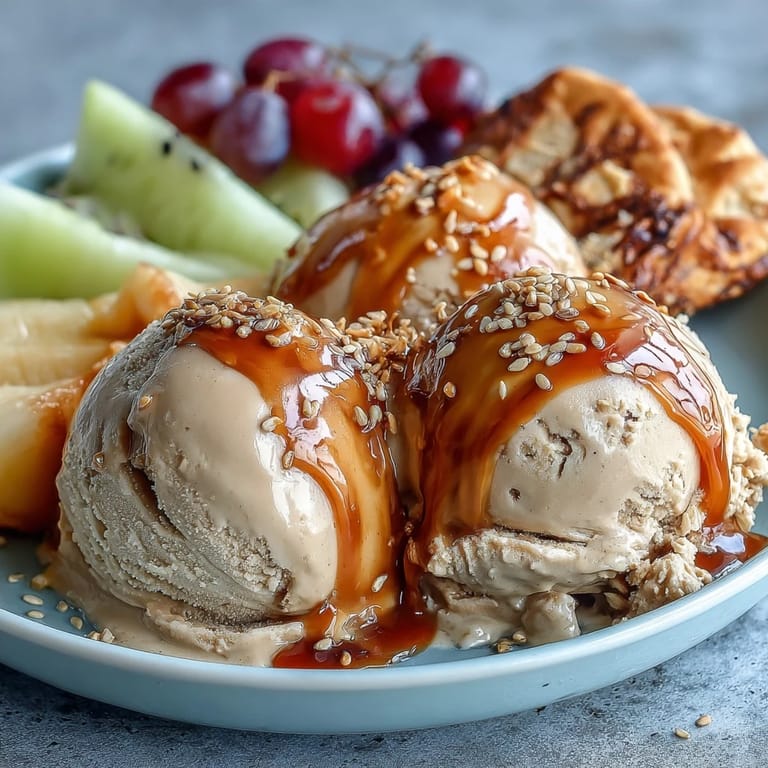
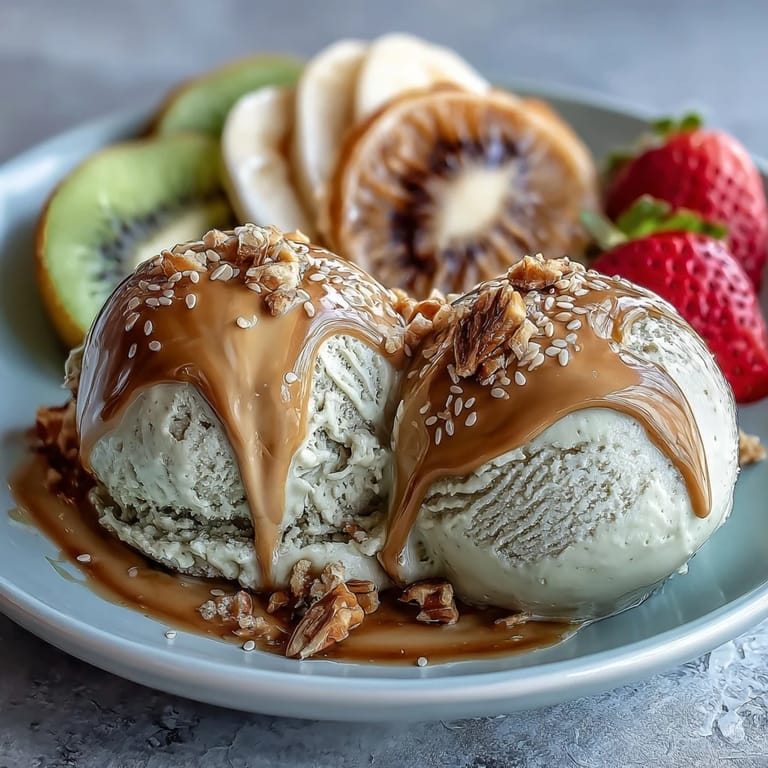
Serve this in small bowls with a sprinkle of toasted sesame seeds for crunch, or drizzle with sweetened condensed milk right before serving for an extra touch of sweetness. Pair with fresh mochi or sliced Asian pears for a stunning dessert platter.
Storage Tips
This ice cream keeps beautifully in the freezer for up to two weeks, though in my house it rarely lasts that long. Press a piece of parchment paper directly onto the surface before sealing to prevent ice crystals from forming.
Making Without an Ice Cream Maker
You can still make this by freezing the chilled custard in a shallow container and stirring vigorously every 30 minutes for the first 3 hours to break up ice crystals. The texture will be slightly less smooth but still completely delicious.
- Use the widest container possible for faster freezing
- Set timers so you do not forget those important stirring intervals
- Let it soften for 5 minutes before scooping
 Save
Save There is something deeply satisfying about transforming simple tea and cream into something so special. I hope this becomes a favorite in your kitchen too.
Recipe FAQs
- → What does hojicha taste like?
Hojicha features a distinctive nutty, caramel-like flavor with subtle earthy notes from the roasted green tea leaves. The roasting process reduces bitterness, creating a mellow, naturally sweet profile that pairs beautifully with rich cream and sugar.
- → Can I make this without an ice cream maker?
Yes, though the texture will be slightly denser. Pour the chilled custard into a shallow container and freeze for 45 minutes. Stir vigorously with a fork to break up ice crystals, repeating every 30 minutes for 3-4 hours until firm but scoopable.
- → How long does homemade hojicha ice cream keep?
Properly stored in an airtight container, this homemade treat maintains optimal quality for 1-2 weeks. For best flavor and texture, consume within the first week. Place parchment paper directly on the surface to prevent ice crystal formation.
- → What's the difference between hojicha and matcha?
Hojicha consists of roasted green tea leaves and stems, resulting in a reddish-brown brew with nutty, caramel notes. Matcha is finely ground shade-grown green tea leaves, offering vibrant green color and grassy, umami flavors. Hojicha's roasting also reduces caffeine content significantly.
- → Can I substitute hojicha with other teas?
Genmaicha (brown rice green tea) creates a similar nutty profile. For distinct alternatives, try Earl Grey for bergamot notes or chai spices for warmth. However, hojicha's unique roasted character specifically complements the creamy custard base.
- → Why is my custard not thickening?
Precise temperature control matters—cook until reaching 170–175°F while stirring constantly. If the mixture exceeds 180°F, eggs may scramble. Using a thermometer helps achieve proper consistency. The custard is ready when coating the back of a spoon.